


Right data? Right alerts?
Are you using Sentinel's new SOC Optimization feature to optimize your SIEM?


A SIEM is one of the greatest tools a security team has to help detect and analyze security threats. But to be effective, it needs constant care and feeding. Optimizing your SIEM is key to getting true value out of the large chunk it takes out of your security budget. There are several tasks the security team needs perform to make sure the SIEM is as effective as it can be. Things like:
Collecting the right data
Alerting on the right activities
Staying abreast of the latest attack vectors
Monitoring performance
Today, I want to share a new(ish) feature inside of Microsoft Sentinel that can help with these tasks so you can optimize your experience.
If you go into the Sentinel portal, you will see a new blade called SOC Optimization (Preview).
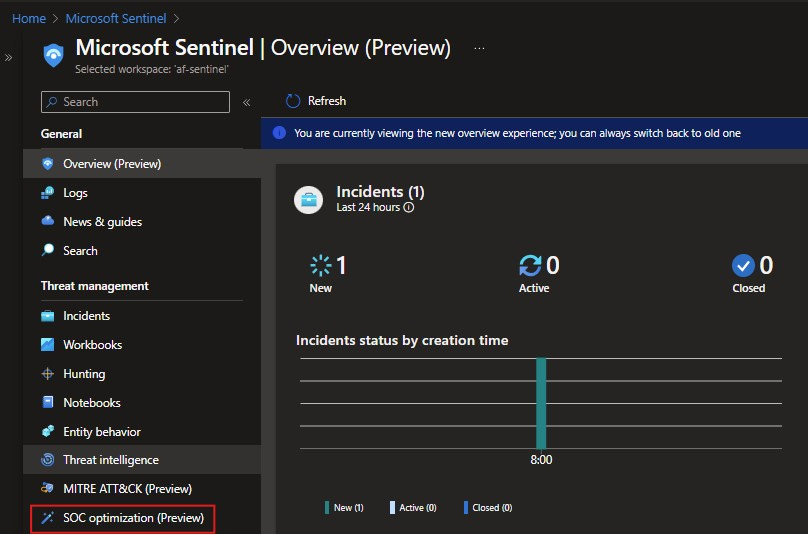
This new preview feature delivers actionable recommendations to improve your security practice. These suggestions help you close coverage gaps against specific threats. They also show when data you’re ingesting is not being utilized. This can help you decide if this is data you actually need or indicate that you might not have the right analytic rules in place.
Let’s look at the threat optimizations first. Sentinel has hundreds of analytic rules that you can turn on right out of the box. This is great because that means you don’t have to create all of them yourself. But the downside is that it can be daunting to know which rules to enable to ensure you’re protected. With SOC Optimization, you will get recommendations on which data connectors to enable and which rules to turn on to protect yourself from attacks like Adversary in the Middle, Human Operated Ransomware and Business Email Compromise.
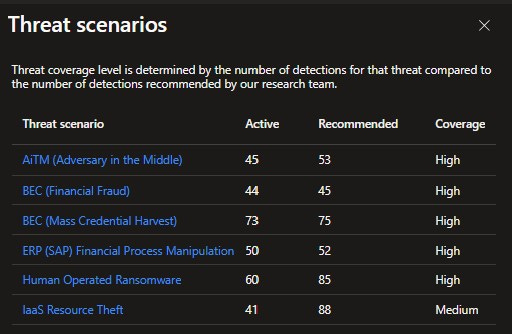
On the top of the Overview page, there is an icon See all threat scenarios.

When you click there, you’ll get a pop up that shows you a list of relevant threats, active and recommended detections, and coverage levels.
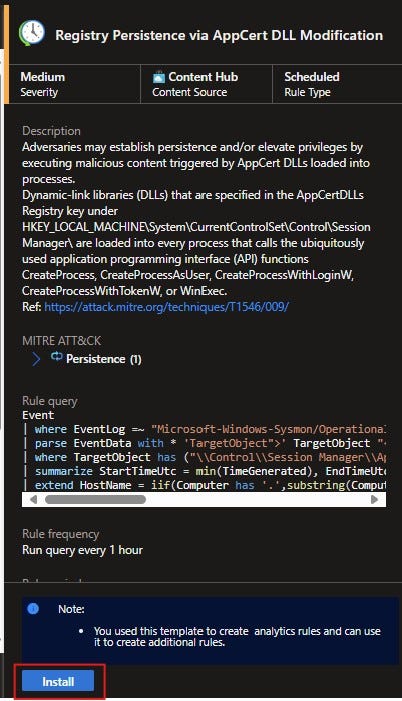
You simply select one of the scenarios. I picked Human Operated Ransomware. This pane gives you a description of the solution, a graph of the MITRE ATT&CK improvements and a Take action section. You can see how I can improve coverage on the attack graph.

From there, click on Go to Content hub. Then you’ll see a list of suggested DataConnectors and AnalyticsRules to enable. Select the item you want to install and then click the Install button in the lower right-hand corner. Or you can select multiple items and then choose the Install button at the top of the page.
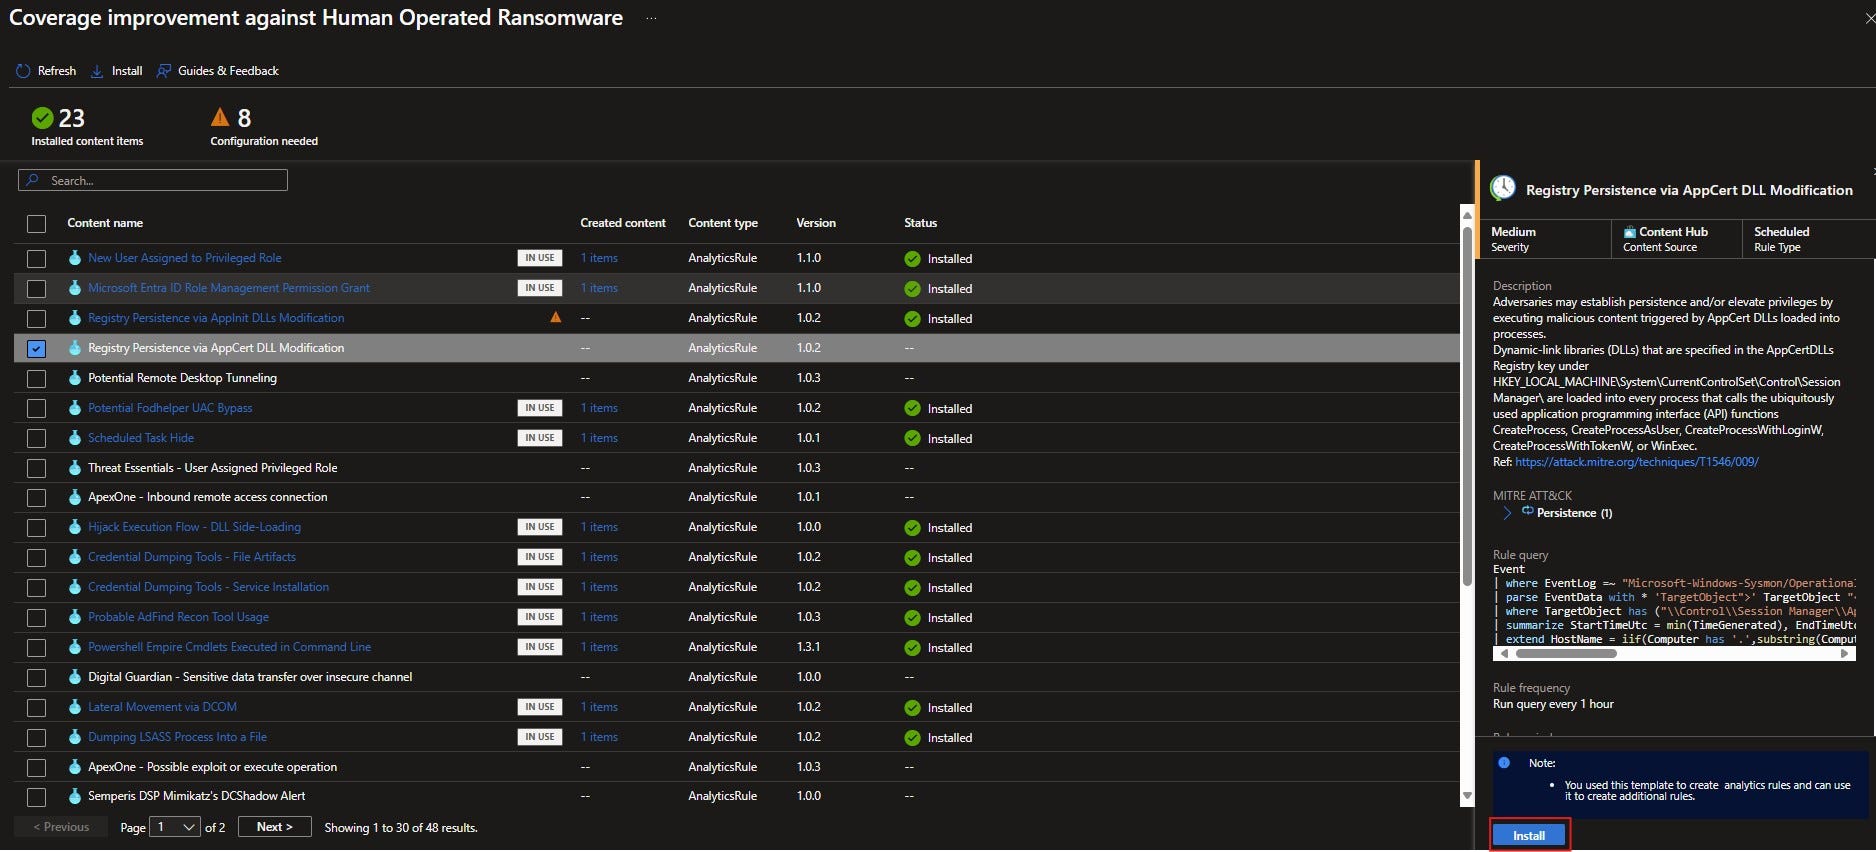
Remember, when you install any dataconnector or analytic rule in Sentinel that doesn’t mean you’ve enabled it. It just means that you’ve made it ready to enable. For the dataconnectors, there will most likely be additional steps to follow. If the analytic rule has not already been installed, you’ll select Install in the lower right but then you’ll need to go back and actually create the rule.
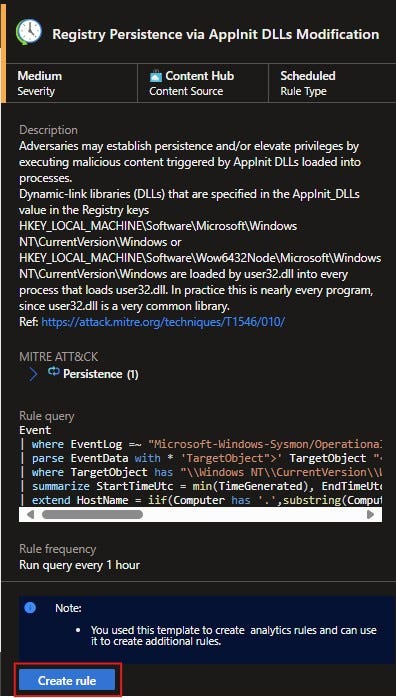
For the rules that have been installed but not enabled, you’ll see an orange yield sign in the UX.
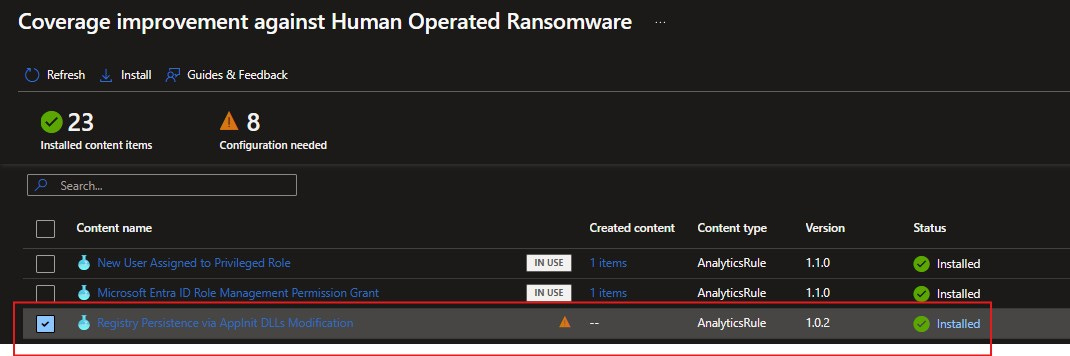
Simply select the check box next to the item and then click Create rule in the lower right and walk through creating a rule just like you do any other time.
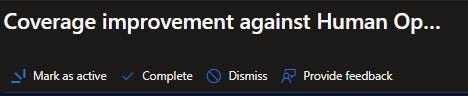
You can also track your progress on managing the optimization recommendations. You can change the status as you walk through each one. You can mark them as active – meaning that you are working to complete the steps of that optimization. You can make them as complete, or you can dismiss them which means you don’t plan on taking the recommended actions and don’t want to see it in the list anymore. You can also provide feedback on how you’re liking the feature and what you’d like to see next.
This SOC Optimization feature is also available in the XDR portal (if you’ve enabled the connection between Sentinel and XDR) but I’ve showed you how to do it in the Sentinel portal in Azure.
Tomorrow, we’ll talk about the data value optimizations of the SOC Optimization feature.