

Vibing Step 1: Set Up VS Code + Workspace, GitHub, Git, and Copilot
Vibe Coding for Security Operations

Your foundation for threat-hunting scripts, forensic helpers, and (later) MCP + custom agents
A quick recap from the last post: why learn to vibe
We all have that list: the hunt we should’ve built, the enrichment we meant to automate, the dashboard that would save hours—if it existed.
The problem was never ideas. The problem was the old reality: building meant backlogs, dev-lottery, vendor forms, and timelines that never matched the threat.
That gap is closing. With vibe coding, analysts can describe what they need in plain language and iterate with AI until it works. Not enterprise-perfect. Working. Now. That’s the shift: you’re not “learning to code” the old way—you’re learning to build.
This series is the practical version of that promise.
And Step 1 is where we set up the environment that makes it possible.
📋 Prerequisites
You’ll need:A Windows / macOS / Linux machine
Ability to install software (admin rights recommended)
An email address (for GitHub)
No prior VS Code experience required.
Part 1 — Install VS Code and set up your Security Workspace
Why this matters (what it does)
VS Code is your workbench: scripts, notes, hunting queries, and agent projects all live here. A workspace is like a “case folder” that remembers your settings, open files, and tooling configuration for a specific project.
In security terms, a workspace is how you keep:
incident artifacts separated
scripts organized and repeatable
consistent settings across analysts
later: MCP configuration and agent tooling scoped to the right project
Step-by-step
1) Install VS Code
Download and install from:
https://code.visualstudio.com/
Windows tips during install (recommended checkboxes):
✅ Add to PATH
✅ Add “Open with Code” to Explorer context menu
✅ Register Code as an editor
2) Create a dedicated folder for security work
Create a folder somewhere easy (example paths):
Windows:
C:\SecurityLab\ThreatHunting\macOS/Linux:
~/SecurityLab/ThreatHunting/
Why: This becomes the single place where scripts, sample logs, notes, and agent projects live—making work easier to share and reproduce.
3) Open the folder in VS Code (creates the “workspace context”)
In VS Code:
File → Open Folder…
Select your
ThreatHuntingfolderClick Open
Now VS Code treats this as your active project.
4) Save a Workspace file (recommended)
This creates a .code-workspace file that “remembers” your setup.
File → Save Workspace As…
Name it:
ThreatHunting-Lab.code-workspaceSave it inside your
SecurityLabfolder (or a “Workspaces” folder)
Why: When you double‑click that workspace file later, VS Code restores your environment exactly—folders, settings, and (in Step 2) MCP/extension configuration.
5) Add a simple starter folder structure (optional but helpful)
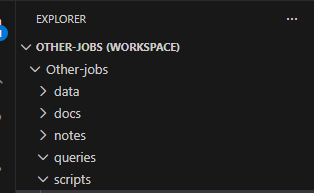
Inside VS Code Explorer, create folders:
scripts/— automation scripts (PowerShell/Python)data/— sample logs, exported events, CSVsnotes/— investigation notes, timelinesqueries/— KQL snippets (we’ll expand in Step 2)docs/ — here we will save our instructions and notes in markdown file format

Why: Analysts work faster when artifacts are consistently organized. It also makes peer review and incident handoff dramatically easier.
Part 2 — Install Git (Version Control)
Why this matters (what it does)
Git is how professionals track every change to scripts and documentation. Think of it as:
an audit trail for your tooling
a way to roll back bad changes
a way to collaborate safely across analysts
the foundation for GitHub workflows (PRs, reviews, CI)
In incident response, this becomes your “chain-of-custody” for tool development: you can show what changed, when, and why.
Step-by-step
1) Install Git
Download: https://git-scm.com/downloads
Install using defaults.
2) Verify Git works
Open VS Code → Terminal → New Terminal, then run:
Shell
git --version
If a version appears, you’re ready.

3) Set your Git identity (recommended)
This labels your commits properly:
Shell
git config --global user.name “Your Name”
git config --global user.email “you@example.com”
Show more lines
Why: It makes teamwork sane—everyone knows who authored a change.
Part 3 — Create a GitHub Account (Your Collaboration Hub)
Why this matters (what it does)
GitHub is where your security team can:
store scripts and playbooks
share reusable threat-hunting helpers
review changes through pull requests
later: host agent scaffolding + MCP-related configs
Even if you’re a solo analyst today, GitHub makes your work portable and reproducible.
Step-by-step
1) Sign up / sign in
https://github.com/join
Choose a clear username if this is for work.
2) Basic account hygiene (recommended)
Turn on Multi-Factor Authentication (MFA)
Review email privacy settings if needed
Why: Security engineers should model good identity hygiene—especially if repos contain internal tooling patterns.
Part 4 — Install GitHub Copilot + Copilot Chat in VS Code
Why this matters (what it does)
Copilot accelerates the “blank page problem” and helps analysts:
generate script scaffolding quickly
translate investigation intent into code
explain code you didn’t write
produce summaries, parsing logic, and helper functions
Important: Copilot is an assistant—not an authority. You still validate outputs before using them in production or investigations.
Step-by-step
1) Install the extensions in VS Code
In VS Code:
Click Extensions (left sidebar)
Install:
GitHub Copilot
GitHub Copilot Chat
(Optional) GitHub Pull Requests and Issues
PS we will install a few more extension in next post
2) Sign in to GitHub from VS Code
Click the Accounts/Profile icon (bottom-left)
Sign in with GitHub
Complete the browser sign-in flow
Why: Copilot requires your GitHub identity to authorize usage and access your subscription/org entitlement.
Part 5 — Verify Everything Works (VS Code ↔ Git ↔ GitHub ↔ Copilot)
Why this matters (what it does)
This quick test prevents wasting time later. If Copilot or Git authentication is broken, Step 2 and Step 3 will be frustrating.
Step-by-step verification
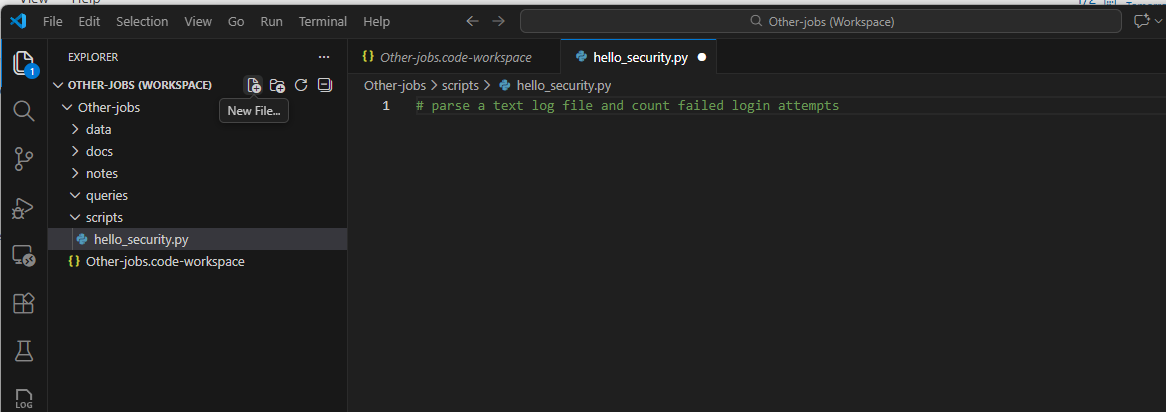
1) Confirm Copilot suggestions appear
Create a file in your workspace under scripts using the Explorer
scripts/hello_security.py
Add this text to the python file
# parse a text log file and count failed login attempt
2) Confirm Git is available inside VS Code
In the Terminal, run:
Shell
git status
Show more lines
You should see something like “Not a git repository” (that’s fine for now) or a status readout.
3) Confirm GitHub sign-in worked
Look for your GitHub account icon in VS Code and confirm you’re signed in.
Where Step 1 Fits in the Roadmap
✅ Step 1 (this post): Install VS Code, create a workspace, install Git, create GitHub, enable Copilot
➡️ Step 2 (next): Install security extensions + configure MCP server integrations inside the workspace
➡️ Step 3: Build your first custom agent + LLM integration leveraging MCP tools
Quick “Troubleshooting” Callouts (common newbie issues)
Copilot not suggesting? Ensure you installed the extension and are signed into GitHub in VS Code.
Git command not found? Reinstall Git and ensure “Add to PATH” is enabled, then restart VS Code.
Workspace feels confusing? Treat the workspace like an “incident case file.” Everything for the case goes inside the workspace folder.
Optional “Pro move” (1 minute): pin your workspace for daily use
Once saved, open your workspace file (ThreatHunting-Lab.code-workspace) and:
pin it to your VS Code “Recent”
or create a shortcut on your desktop
Why: It reduces friction. Friction kills building. The whole point of vibe coding is removing that gap.